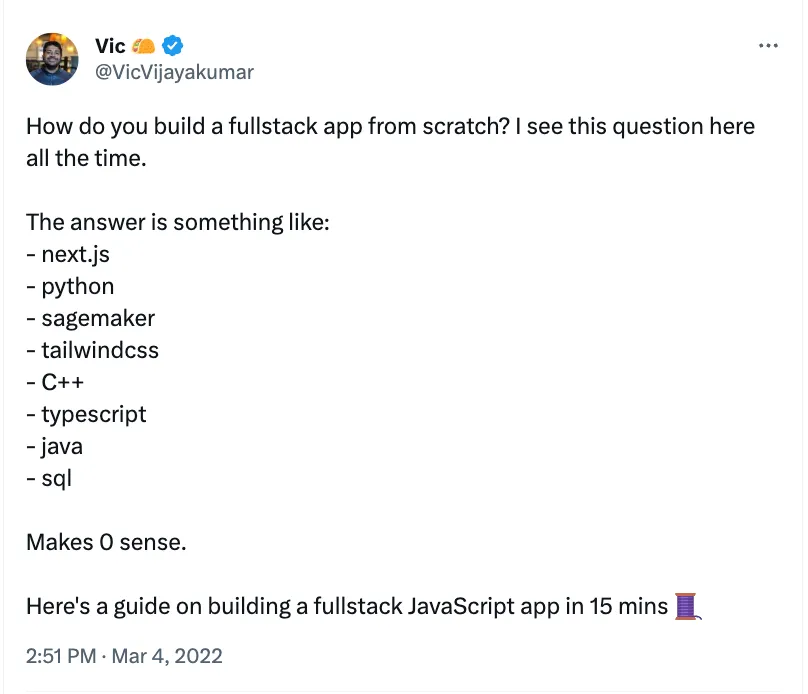
Building a full stack app with Remix, Prisma, and Supabase
/ 9 min read
Pre-requisites
This tutorial assumes a few things. I hope you already have npm / node installed on your machine and are somewhat familiar with how to use a terminal. You can work through this tutorial even without that familiarity; however it will take you a bit longer to get this done. Let’s go! 🚀
We are going to track the amount of water and coffee we are drinking each day in a database, and display it back in a creative format, like the game Wordle.
Set up the Remix framework
We are going to be using the Remix full stack web framework for this tutorial.
❯ npx create-remix@latest

R E M I X - v1.2.3

💿 Welcome to Remix! Let's get you set up with a new project.

? Where would you like to create your app? ./full-stack-app-remix
? Where do you want to deploy? Choose Remix if you're unsure, it's easy to change deployment targets. Vercel
? TypeScript or JavaScript? TypeScript
? Do you want me to run `npm install`? Yes

> postinstall
> remix setup node

Successfully setup Remix for node.

added 683 packages, and audited 684 packages in 26s

182 packages are looking for funding
  run `npm fund` for details

found 0 vulnerabilities
💿 That's it! `cd` into "full-stack-app" and check the README for development and deploy instructions!
Notice that I selected Vercel as my deployment target. I am a big fan of the Vercel developer experience. Feel free to switch this up and pick the deployment target you’re comfortable with.
Open up a new terminal tab and let’s make sure it works.
❯ npm run dev

> dev
> cross-env NODE_ENV=development remix dev

Watching Remix app in development mode...
💿 Built in 350ms
Remix App Server started at http://192.168.50.121:3000
Go to http://localhost:3000 and you’ll see an example Welcome to Remix site.
Set up the database
Prisma is an open source database toolkit for PostgreSQL, MySQL, SQL Server, SQLite, and MongoDB. I like using Prisma in my JavaScript applications as the preferred way to talk to databases.
The app we are building here is perfectly suited for SQLite, but unfortunately you can’t deploy SQLite databases to Vercel, so we are going to instead go with a PostgreSQL database on Supabase.
Step 1: Set up Prisma
❯ npm install --save-dev prisma

❯ npm install @prisma/client

❯ npx prisma init --datasource-provider PostgreSQL

✔ Your Prisma schema was created at prisma/schema.prisma
  You can now open it in your favorite editor.

warn You already have a .gitignore. Don't forget to exclude .env to not commit any secret.

Next steps:
1. Set the DATABASE_URL in the .env file to point to your existing database. If your database has no tables yet, read https://pris.ly/d/getting-started
2. Run prisma db pull to turn your database schema into a Prisma schema.
3. Run prisma generate to generate the Prisma Client. You can then start querying your database.

More information in our documentation:
https://pris.ly/d/getting-started
Before we can access our database from code, we also need to create a file that helps us make a connection to Prisma. Let’s add a file named app/lib/db.server.ts. The .server.ts part of the filename is pretty cool. It guarantees that Remix will never bundle the file and send it to clients.
import { PrismaClient } from "@prisma/client";

let db: PrismaClient;

declare global {
  var db: PrismaClient | undefined;
}

// PrismaClient is attached to the `global` object in development to prevent
// exhausting your database connection limit.
if (process.env.NODE_ENV === "production") {
  db = new PrismaClient();
  db.$connect();
} else {
  if (!global.db) {
    global.db = new PrismaClient();
    global.db.$connect();
  }

  db = global.db;
}

export default db;
Step 2: Create your database on Supabase
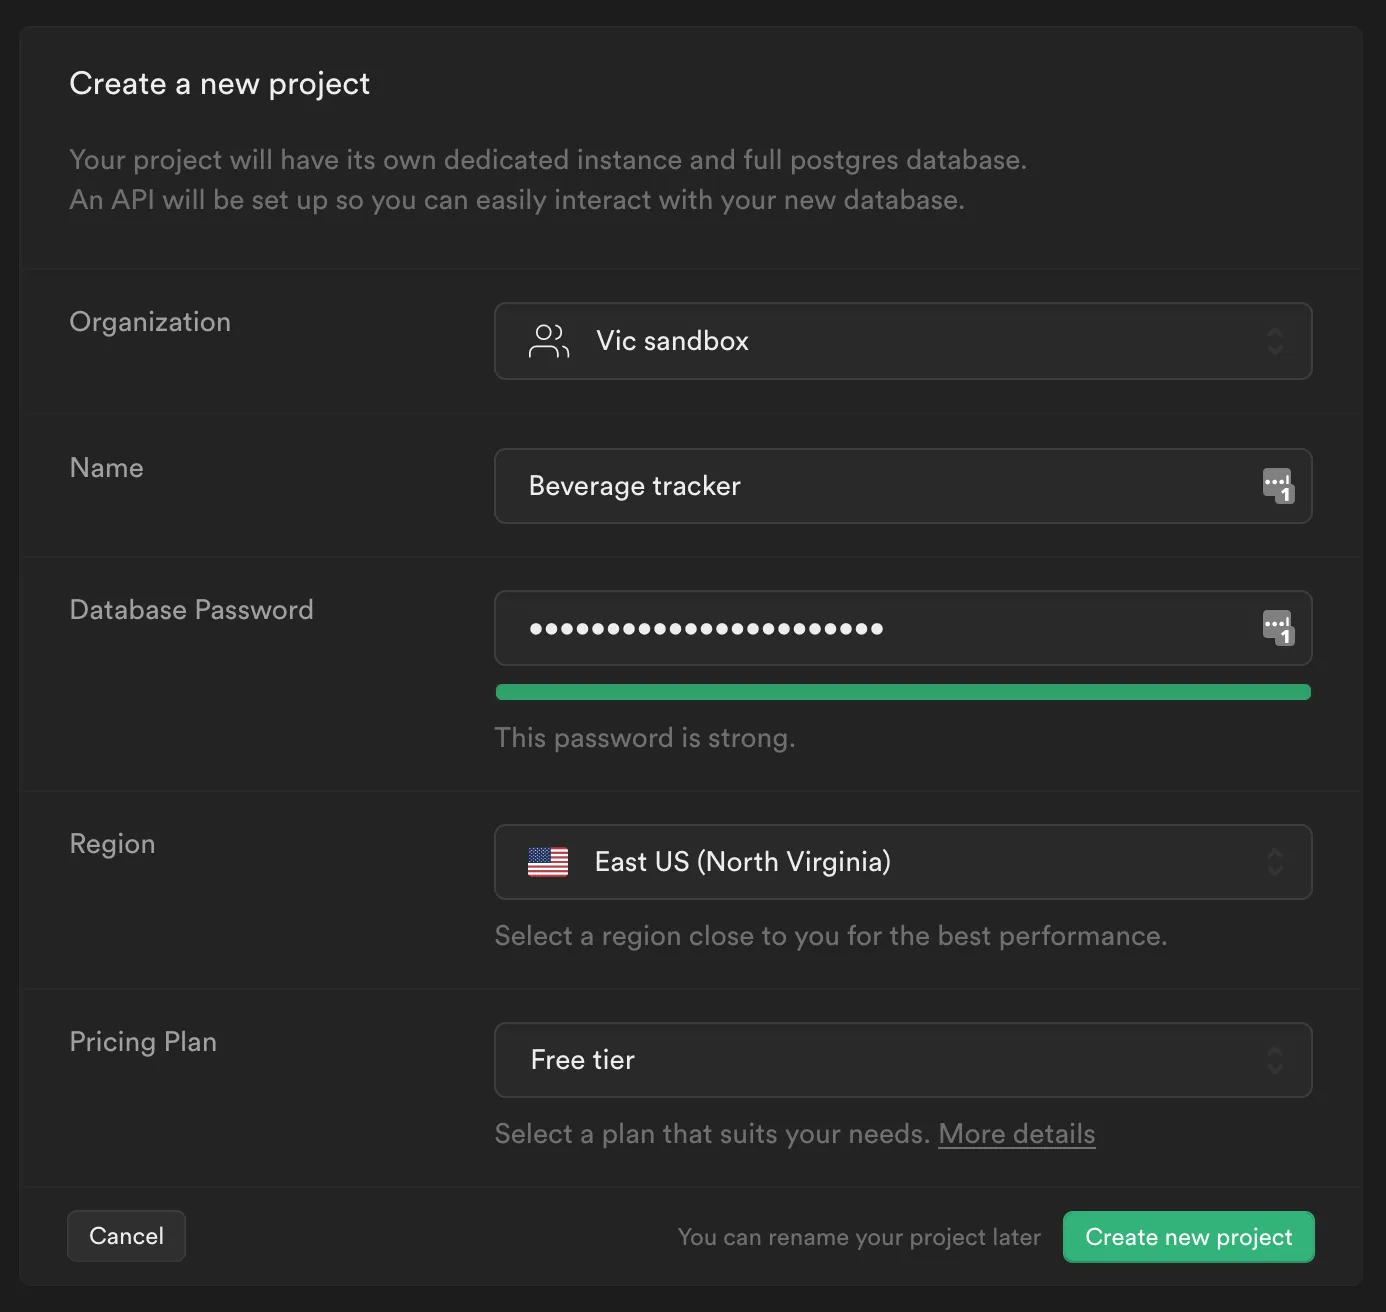
If you remember, we initted a PostgreSQL datasource when we set up Prisma. There are many different vendors to help us set up a database for development, and for this example we are going to use Supabase. Let’s sign up for an account with Supabase and create a free New Project (you’ll be asked to create a new Organization first).
After your database has been created, go to Settings > Database, scroll down to the bottom, and copy the connection string URI.
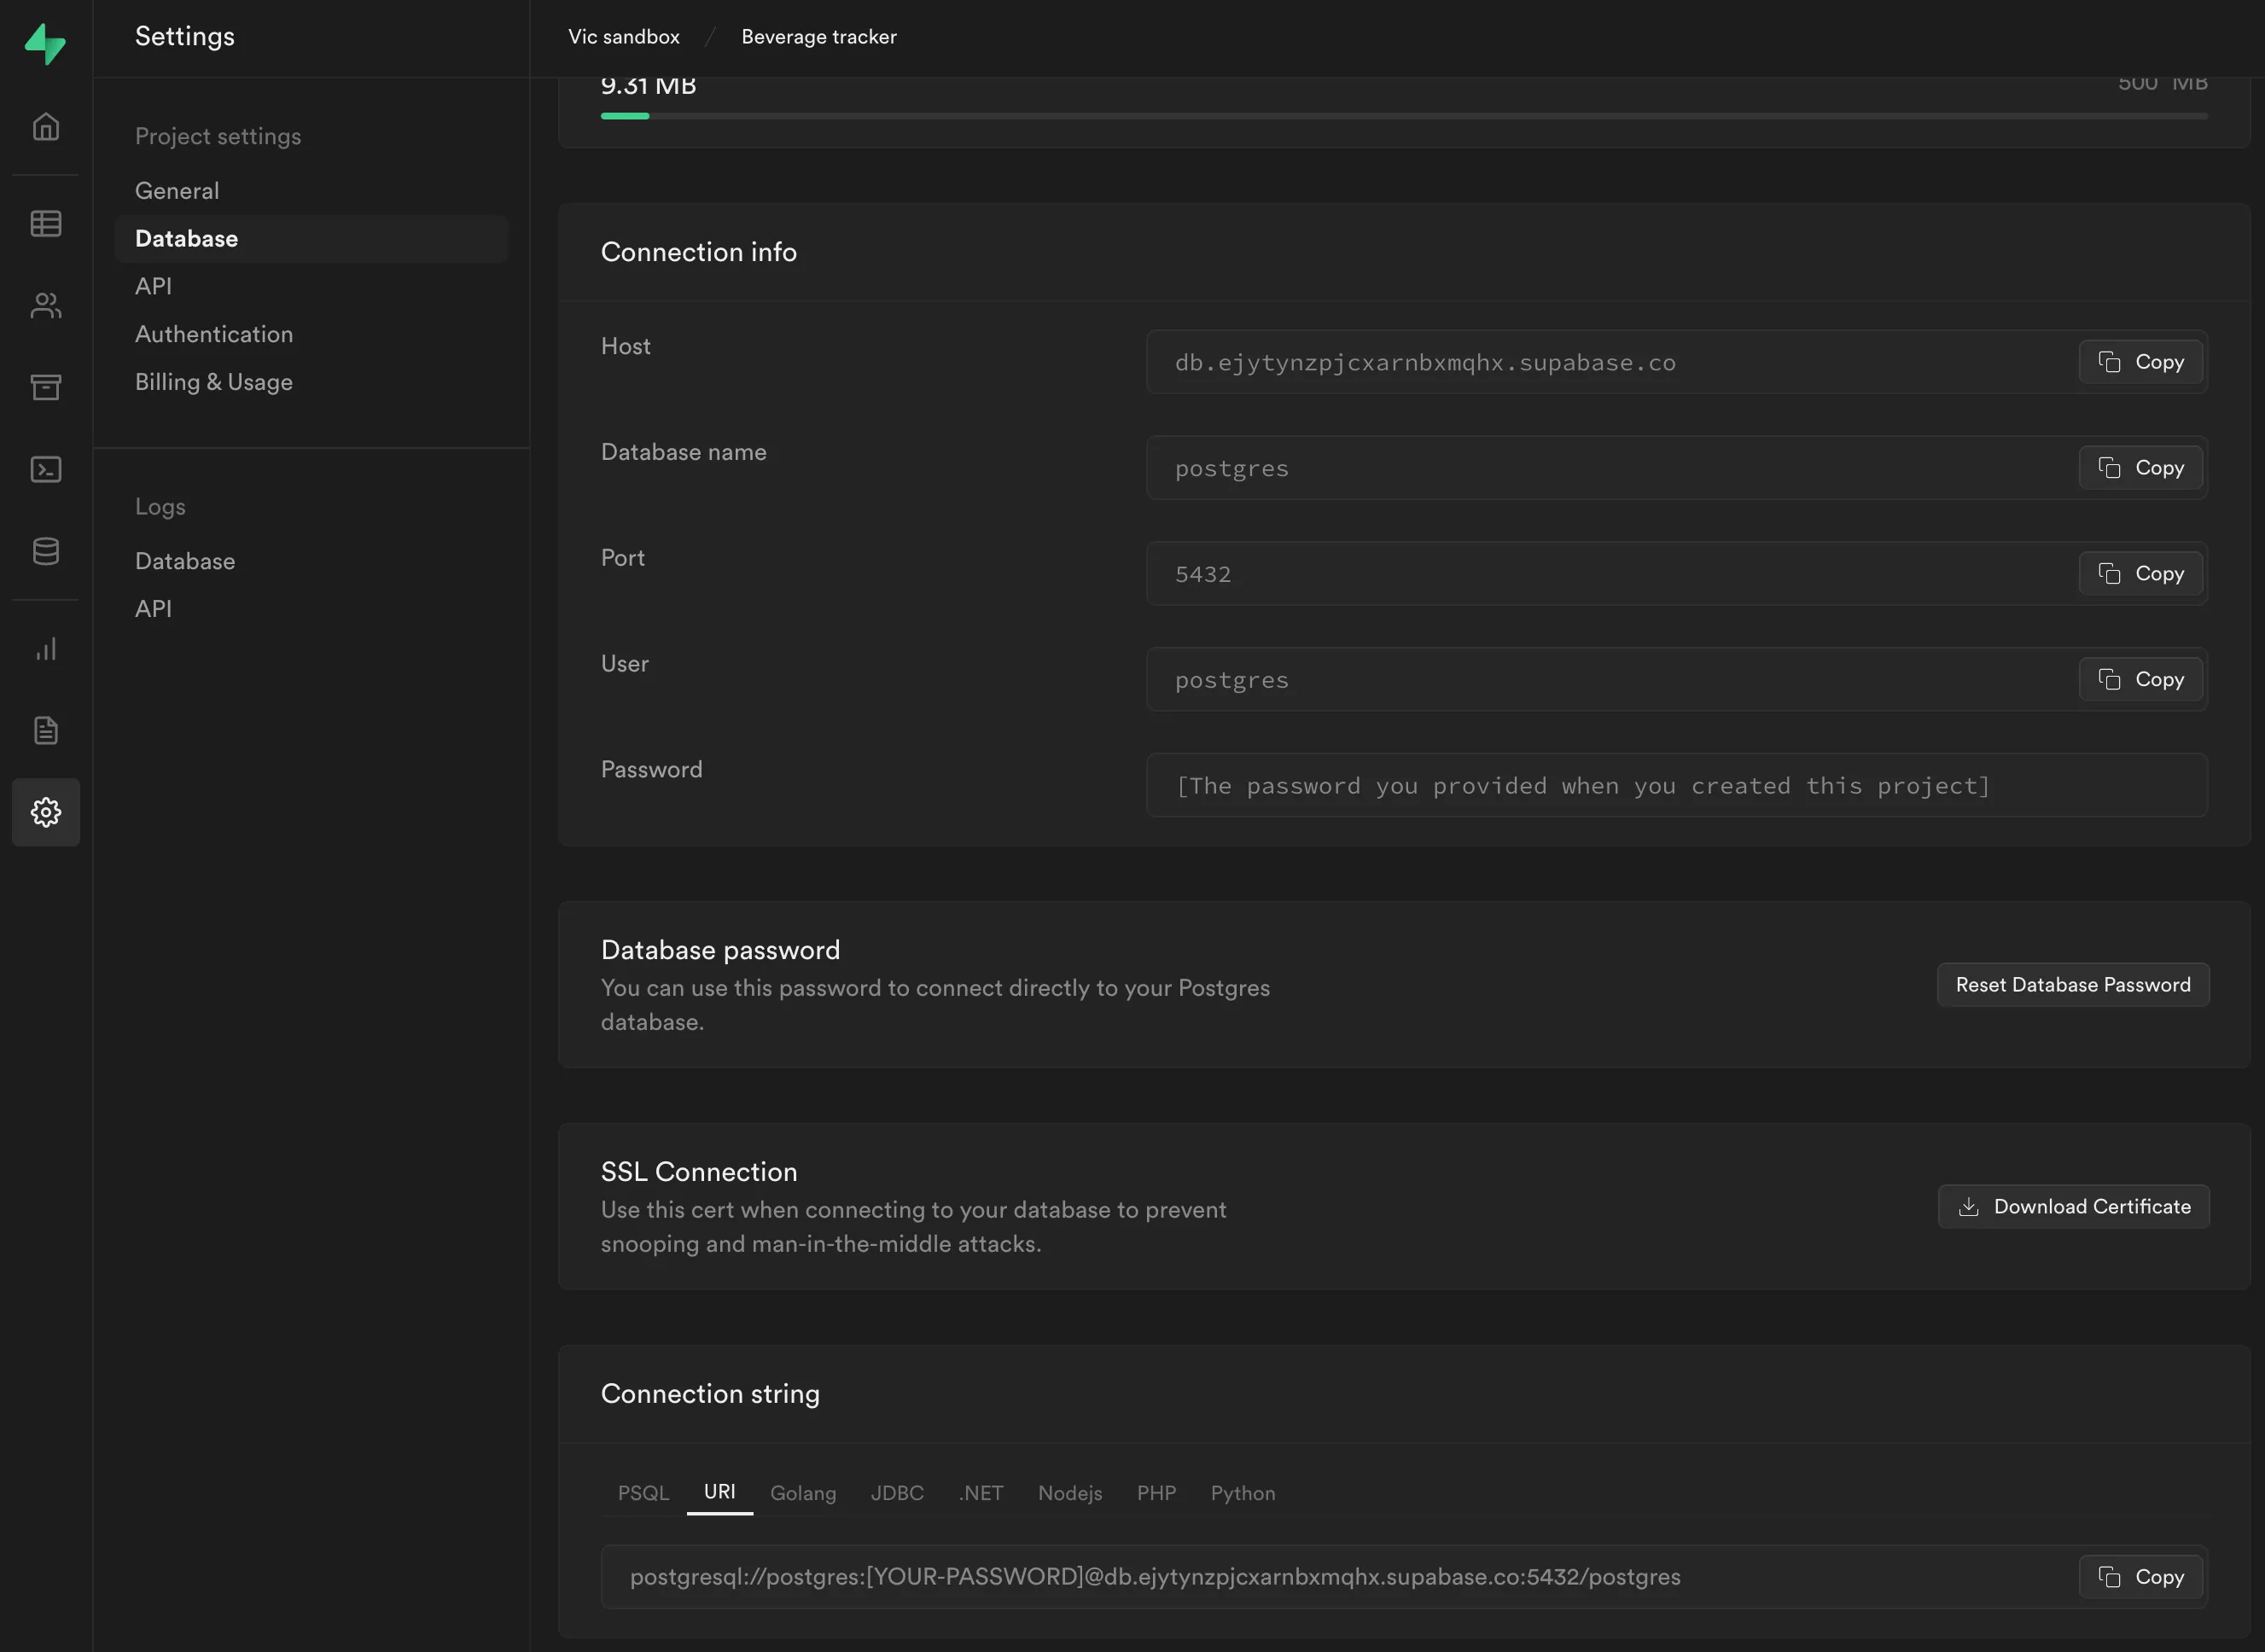
You will need to add this to your .env file. Prisma has helpfully created a DATABASE_URL key in our .env file for us. Replace it with the real one.
# Environment variables declared in this file are automatically made available to Prisma.
# See the documentation for more detail: https://pris.ly/d/prisma-schema#accessing-environment-variables-from-the-schema

# Prisma supports the native connection string format for PostgreSQL, MySQL, SQLite, SQL Server, MongoDB (Preview) and CockroachDB (Preview).
# See the documentation for all the connection string options: https://pris.ly/d/connection-strings

DATABASE_URL="postgresql://postgres:[YOUR-PASSWORD]@db.exampleproject.supabase.co:5432/postgres?schema=public"
Step 3: Create a Beverage table
We need to make sure that we have correctly confiured Prisma and that our connection string to talk to Supabase is correct. What we are going to do in this step is to create a “model” in Prisma (a table) and then tell Prisma to create that model in our datasource. Open up prisma/schema.prisma and add the Beverage model as shown below.
// This is your Prisma schema file,
// learn more about it in the docs: https://pris.ly/d/prisma-schema

generator client {
  provider = "prisma-client-js"
}

datasource db {
  provider = "postgresql"
  url      = env("DATABASE_URL")
}

model Beverage {
  id        Int      @id @default(autoincrement())
  name      String
  createdAt DateTime @default(now()) @db.Date
}
Save the file, and now let’s see if Prisma is able to talk to Supabase.
❯ npx prisma db push
Environment variables loaded from .env
Prisma schema loaded from prisma/schema.prisma
Datasource "db": PostgreSQL database "postgres", schema "public" at "db.exampleproject.supabase.co:5432"
🚀 Your database is now in sync with your schema. Done in 1.50s
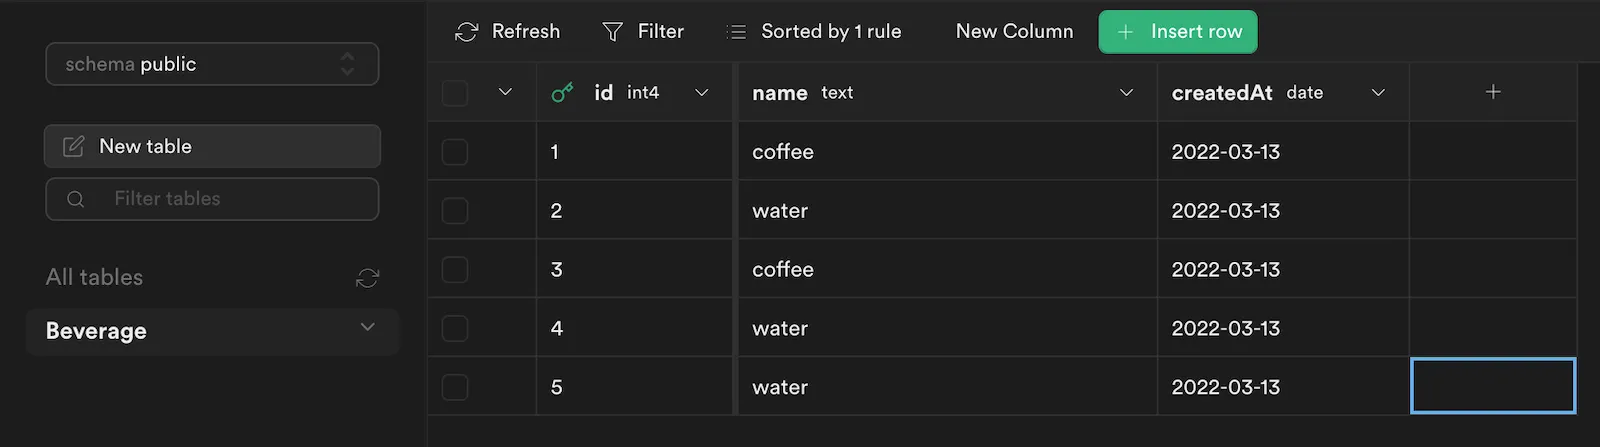
✔ Generated Prisma Client (3.10.0 | library) to ./node_modules/@prisma/client in 538msIf you go to Supabase and into your project, you will now see that there is a Beverage table in your database. While we’re here let’s go ahead and add some dummy data.
Read from the database
We’ve done a lot already. We set up Remix, we set up Prisma, we signed up for a Supabase account, we made sure that Prisma can talk to Supabase. Give yourself a pat on the back.
Next up, we want to make sure that we can read our PostgreSQL database from our code. Open up app/routes/index.tsx and let’s replace it with the following snippet:
import { useLoaderData } from "remix";
import type { LoaderFunction } from "remix";
import type { Beverage } from "@prisma/client";

// Import the Prisma client
import db from "~/lib/db.server";

// Each route can define a "loader" function that will be called
// on the server before rendering to provide data to the route.
type LoaderData = { items: Array<Beverage> };
export const loader: LoaderFunction = async () => {
  const data = {
    items: await db.beverage.findMany(),
  };

  return data;
};

export default function IndexRoute() {
  // This hook returns the JSON parsed data from your route loader function.
  const data = useLoaderData<LoaderData>();

  return (
    <>
      {data.items.map((item) => (
        <span key={item.id} style={{ marginRight: "2px" }}>
          {item.name === "coffee" ? <span>🟫</span> : <span>🟦</span>}
        </span>
      ))}
    </>
  );
}
Save the file, switch to your http://localhost and… 🟫 🟦 🟫 🟦 🟦 It works!
Forms, and entering data from our site
We need to enter data into the database somehow, so next let’s work on a form to submit what we are currently drinking.
Forms in Remix are super simple. No need to build an API or anything.
First we create a form, and then we create the form handler. Both are going to live in the same file, our IndexRoute.
import { useLoaderData, Form, redirect } from "remix";
import type { LoaderFunction, ActionFunction } from "remix";
import type { Beverage } from "@prisma/client";
// Import the Prisma client
import db from "~/lib/db.server";
// Each route can define a "loader" function that will be called
// on the server before rendering to provide data to the route.
type LoaderData = { items: Array<Beverage> };
export const loader: LoaderFunction = async () => {
const data = {
items: await db.beverage.findMany(),
};
return data;
};
// The "action" function is a server-only function to handle data mutations
// and other actions.
export const action: ActionFunction = async ({ request }) => {
const form = await request.formData();
const beverageName = form.get("beverageName");
// Rudimentary data validation
if (beverageName !== "coffee" && beverageName !== "water") {
throw new Error("Invalid form values.");
}
await db.beverage.create({ data: { name: beverageName } });
return redirect(`/`);
};
export default function IndexRoute() {
// This hook returns the JSON parsed data from your route loader function.
const data = useLoaderData<LoaderData>();
return (
<>
{data.items.map((item) => (
<span key={item.id} style={{ marginRight: "2px" }}>
{item.name === "coffee" ? <span>🟫</span> : <span>🟦</span>}
</span>
))}
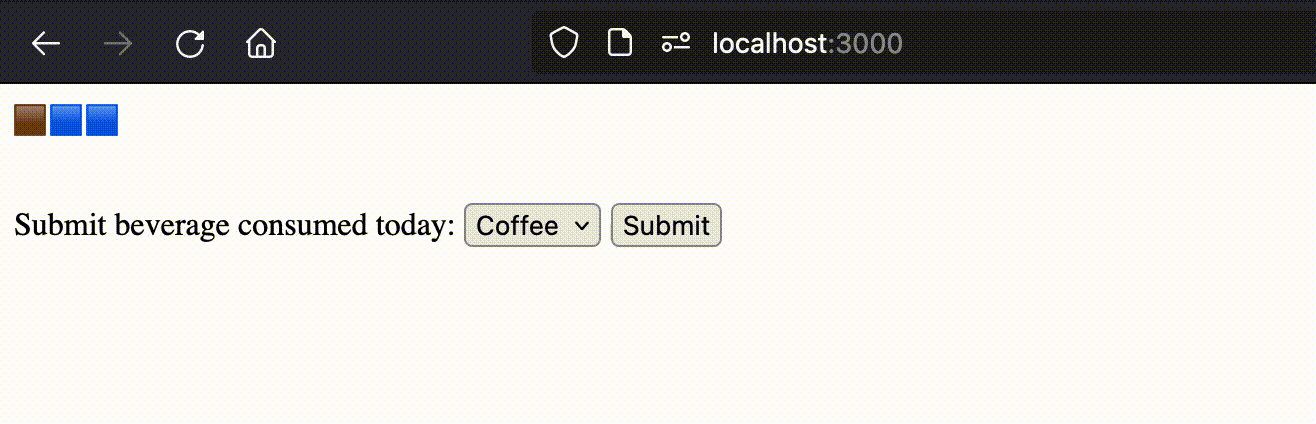
<Form method="post" style={{ marginTop: "30px" }}>
<label>
Submit beverage consumed today:{" "}
<select name="beverageName">
<option value="water">Water</option>
<option value="coffee">Coffee</option>
</select>
</label>
<button type="submit" style={{ marginLeft: "5px" }}>
Submit
</button>
</Form>
</>
);
}Try it out!
We’re going to make one more cosmetic change here. Much like the Wordle game, we only want to display the beverages consumed today, so let’s change our Loader slightly.
export const loader: LoaderFunction = async () => {
  const todayDate = new Date();
  todayDate.setHours(0, 0, 0, 0);

  const data = {
    items: await db.beverage.findMany({
      where: {
        createdAt: {
          gte: todayDate,
        },
      },
      orderBy: {
        createdAt: "asc",
      },
    }),
  };

  return data;
};
Deploy all of this to Vercel
Vercel has an incredible developer experience and I love using them, both for my Next.js projects as well as Remix. This very site is hosted on Vercel! I’m going to make an assumption here that you have already signed up on Vercel and have their cli tool working.
❯ vercel --prod
Vercel CLI 24.0.0
? Set up and deploy “~/Workspace/sandbox/full-stack-app-remix”? [Y
/n] y
? Which scope do you want to deploy to? Vic Sandbox
? Link to existing project? [y/N] n
? What’s your project’s name? full-stack-app-remix
? In which directory is your code located? ./
Auto-detected Project Settings (Remix):
- Build Command: remix build
- Output Directory: public
- Development Command: remix dev
? Want to override the settings? [y/N] n
🔗  Linked to vicsandbox/full-stack-app-remix (created .vercel)
🔍  Inspect: https://vercel.com/___________ [2s]
✅  Production: https://full-stack-app-remix.vercel.app [copied to clipboard] [59s]
That’s…it. Vercel uses the Supabase url we defined in our .env file as a production environment variable for the site it built. On a real production app, you likely want to configure a separate production database using the environment variables panel from your Vercel dashboard, but for a little demo, this will do.
The source code for this demo is at https://github.com/needcaffeine/full-stack-app-remix-demo
I originally wrote out this tutorial on Twitter. You may also wish to follow the discussion there.